Rover Wheels
Yes, the wheels of the Rover require their own page. It was the wheels that slowed down the project because they kept falling off. In the end, after 5 different methods to keep the wheels on, I came up with the solution.
The photos show the sequence of the different methods I tried. I should mention that I WANTED to have all metal at the very beginning, but it was so EASY just to print what I thought would work. Each photo has a caption under it for explanation.
Bottom Line: the problem was the slippery plastic on a chrome motor shaft. I tried to rough it up with a diamond cutter, but not enough to make a difference. The issue required a metal to metal solution, with no plastic in the motor coupler at all.
 screws")
 screws started backing out I \"fixed\" with a hose clamp")


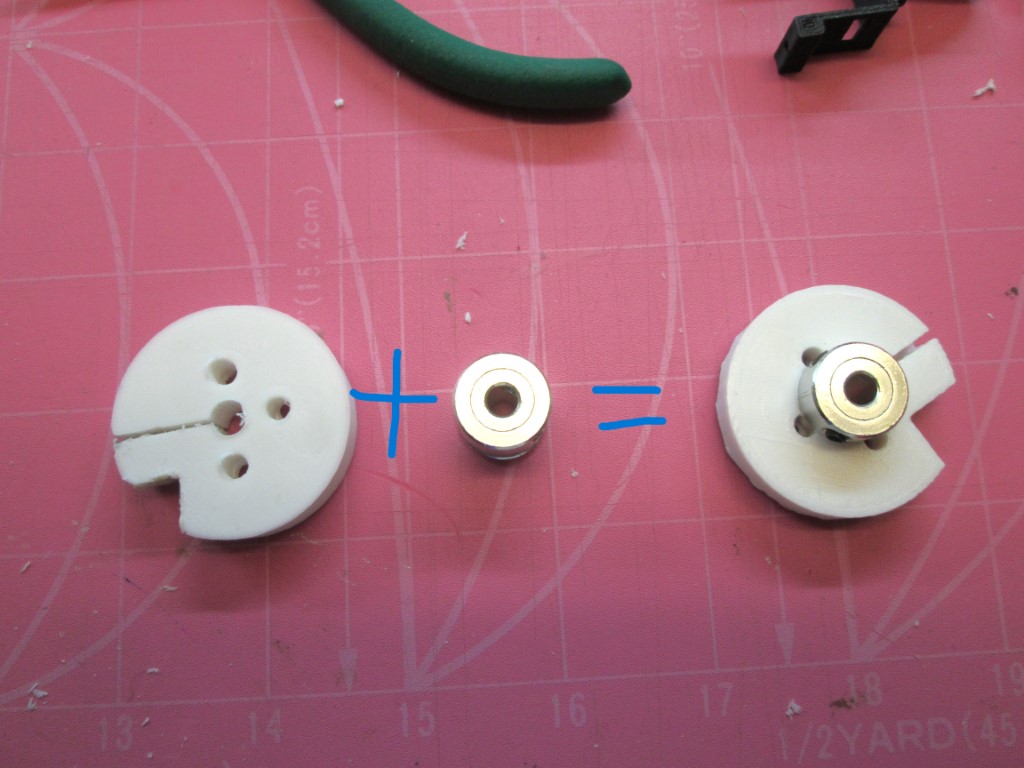

My next attempt was to make this part. Only 3 holes because I coudn't put one where the tightening screw was.
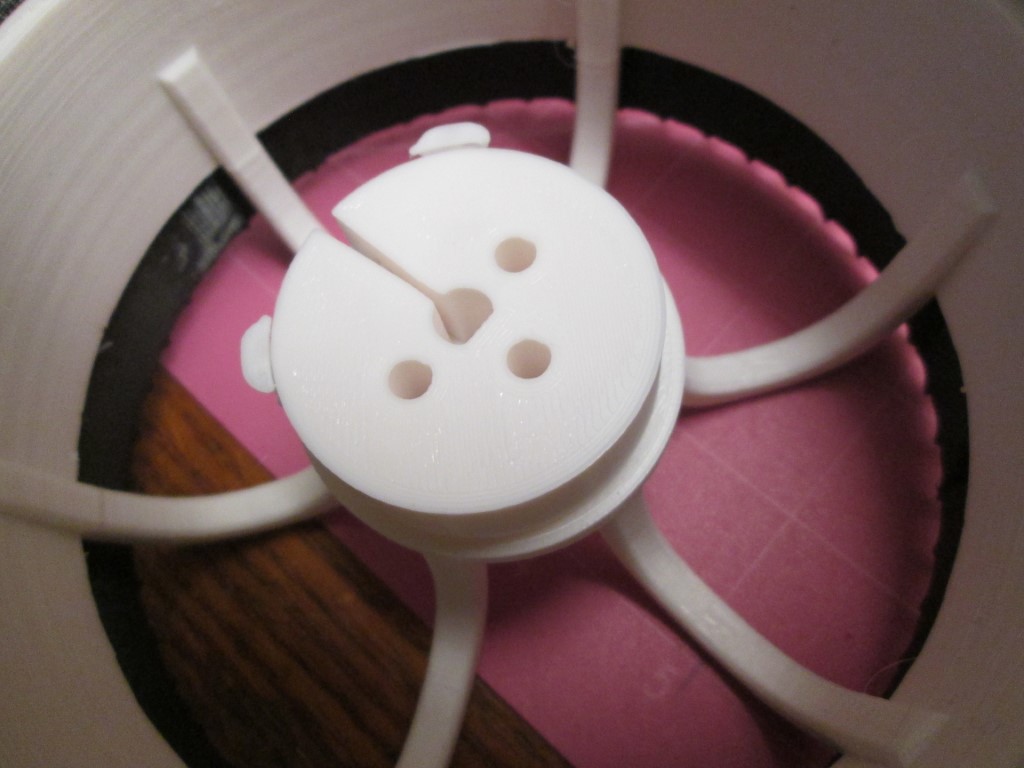
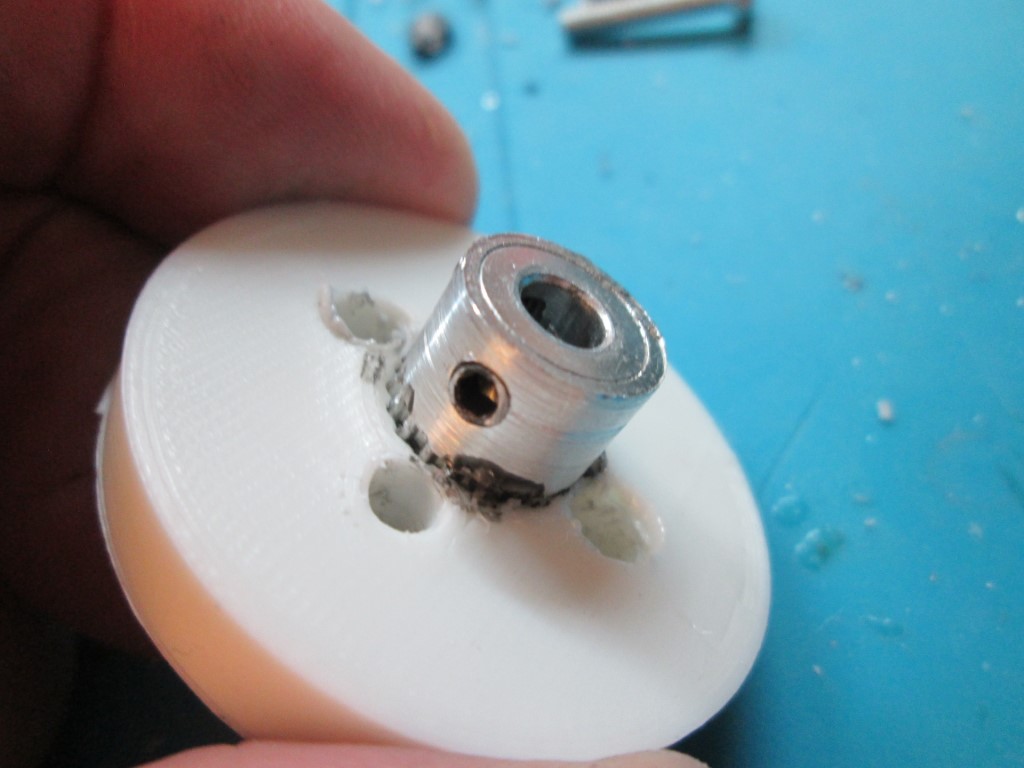
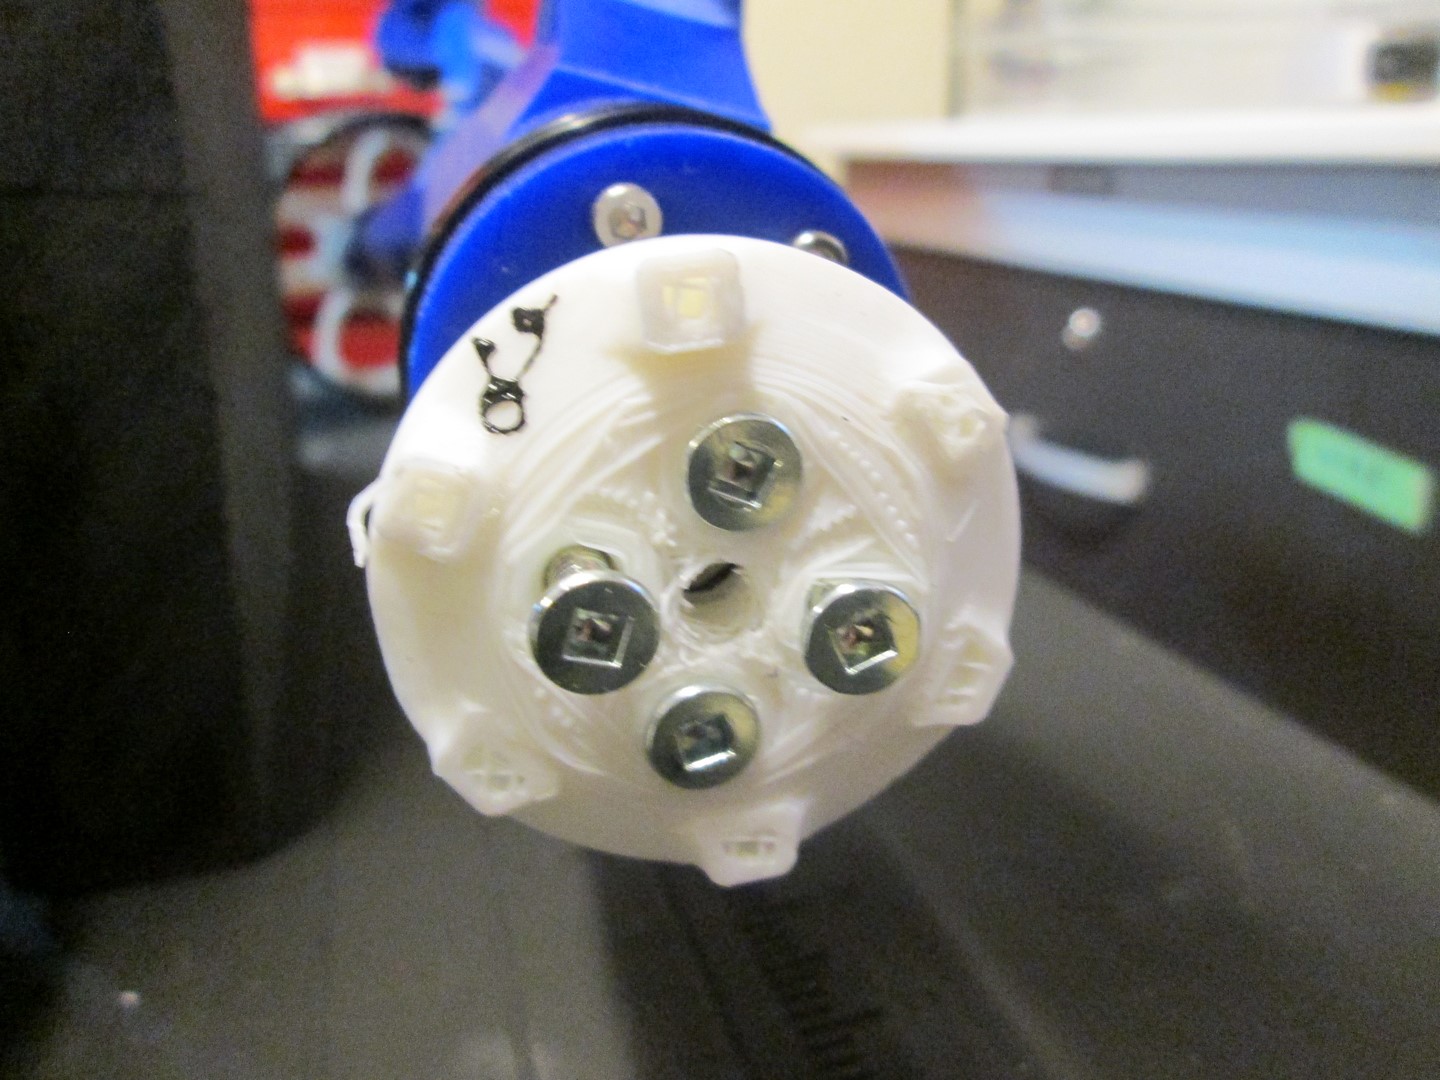
Original design of the wheel coupler. The holes on circumference are for grub (set) screws.
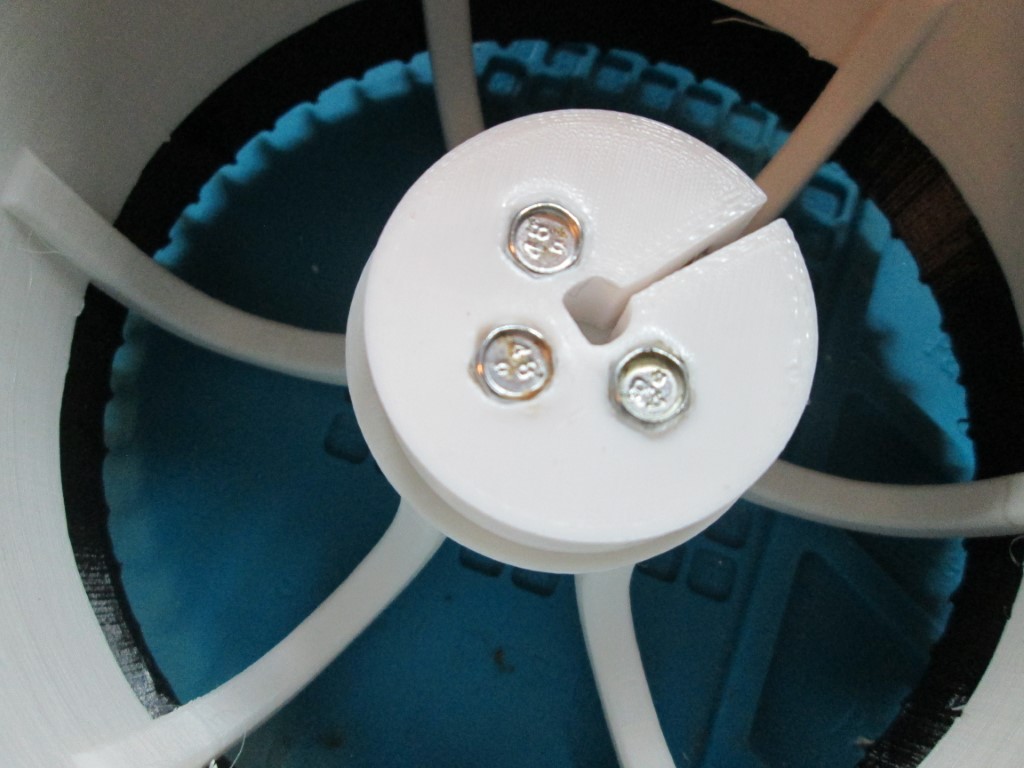
When the grub screws started backing out of the plastic, I "fixed" the issue with a hose clamp. The 4 holes are threaded for M4 screws.
The screw and nut compress the slot to hold the coupler tight on the motor shaft. Problem was, not tight enough.
Screws come in from the wheel rim (under the coupler). At one time I had brass inserts to take the screw...didn't help.
I then got the bright idea of reversing the screws so that the studs sticking out were like those on a car. Worked okay but didn't solve the tightness of the coupler to the motor
Can't get it any tighter than this. This is when I realized the problem was the plastic and the chrome motor shaft.
My next move was to use a timing belt pulley, heated enough to melt the plastic, as shown above. The grub screws were now in aluminum and will not loosen.
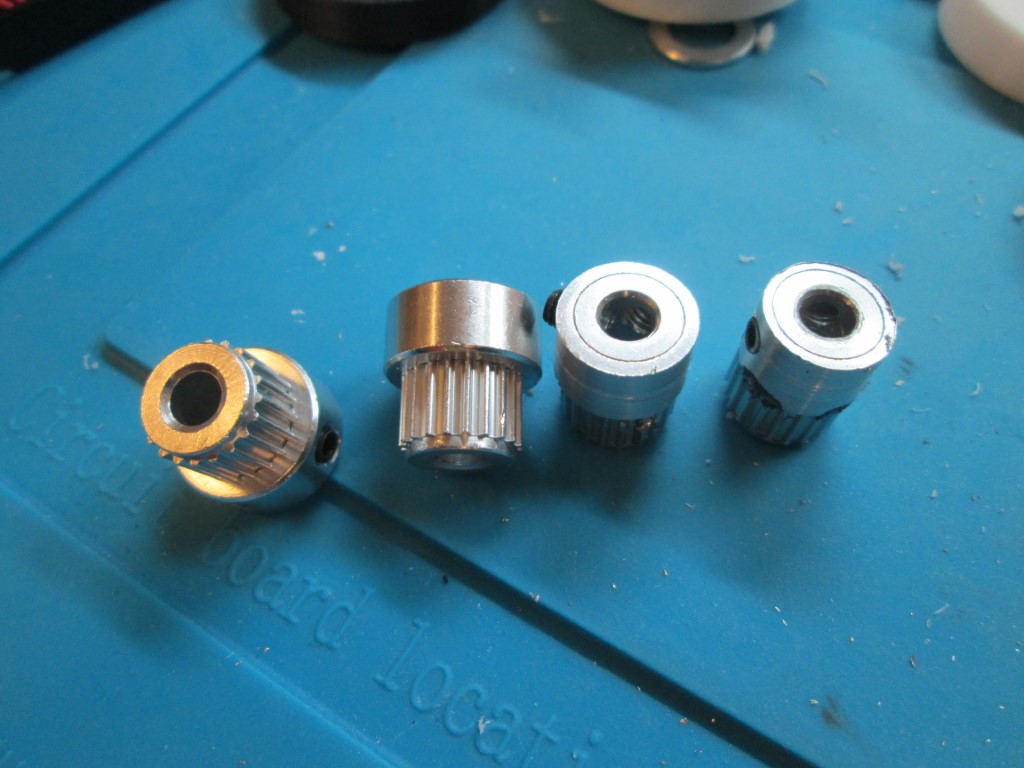
These are the pulleys I used. I removed the outside flange.
Melted plastic coupler, made a real tight fit at first. See below
Complete assembly
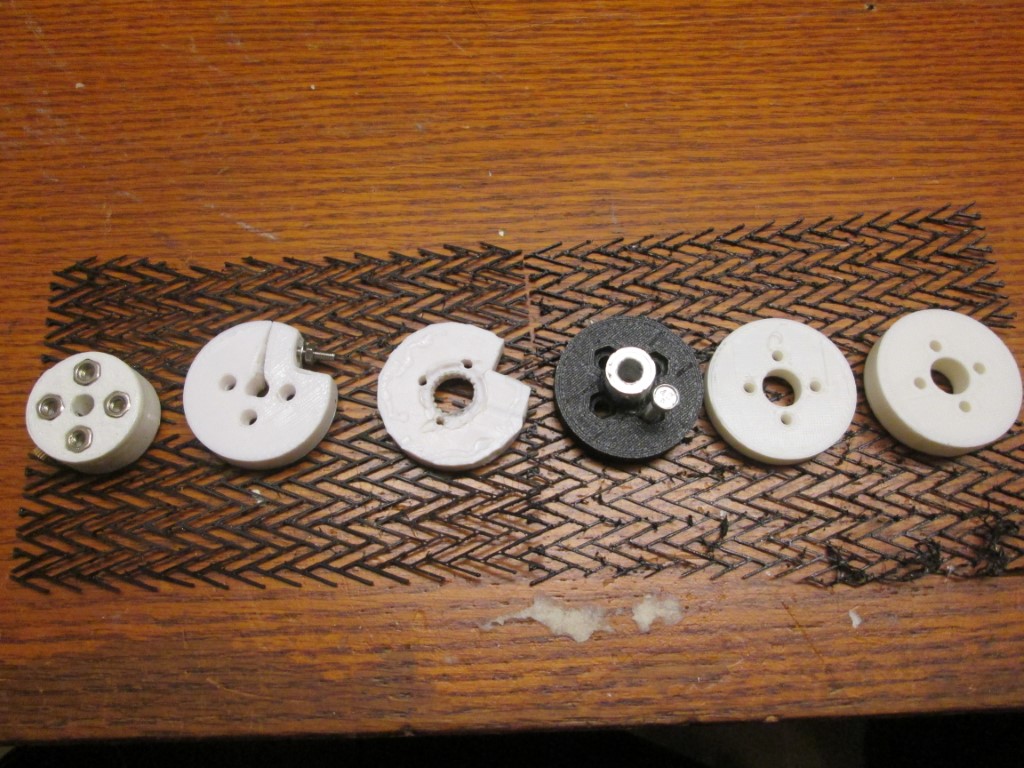
The lineup showing the bad ideas
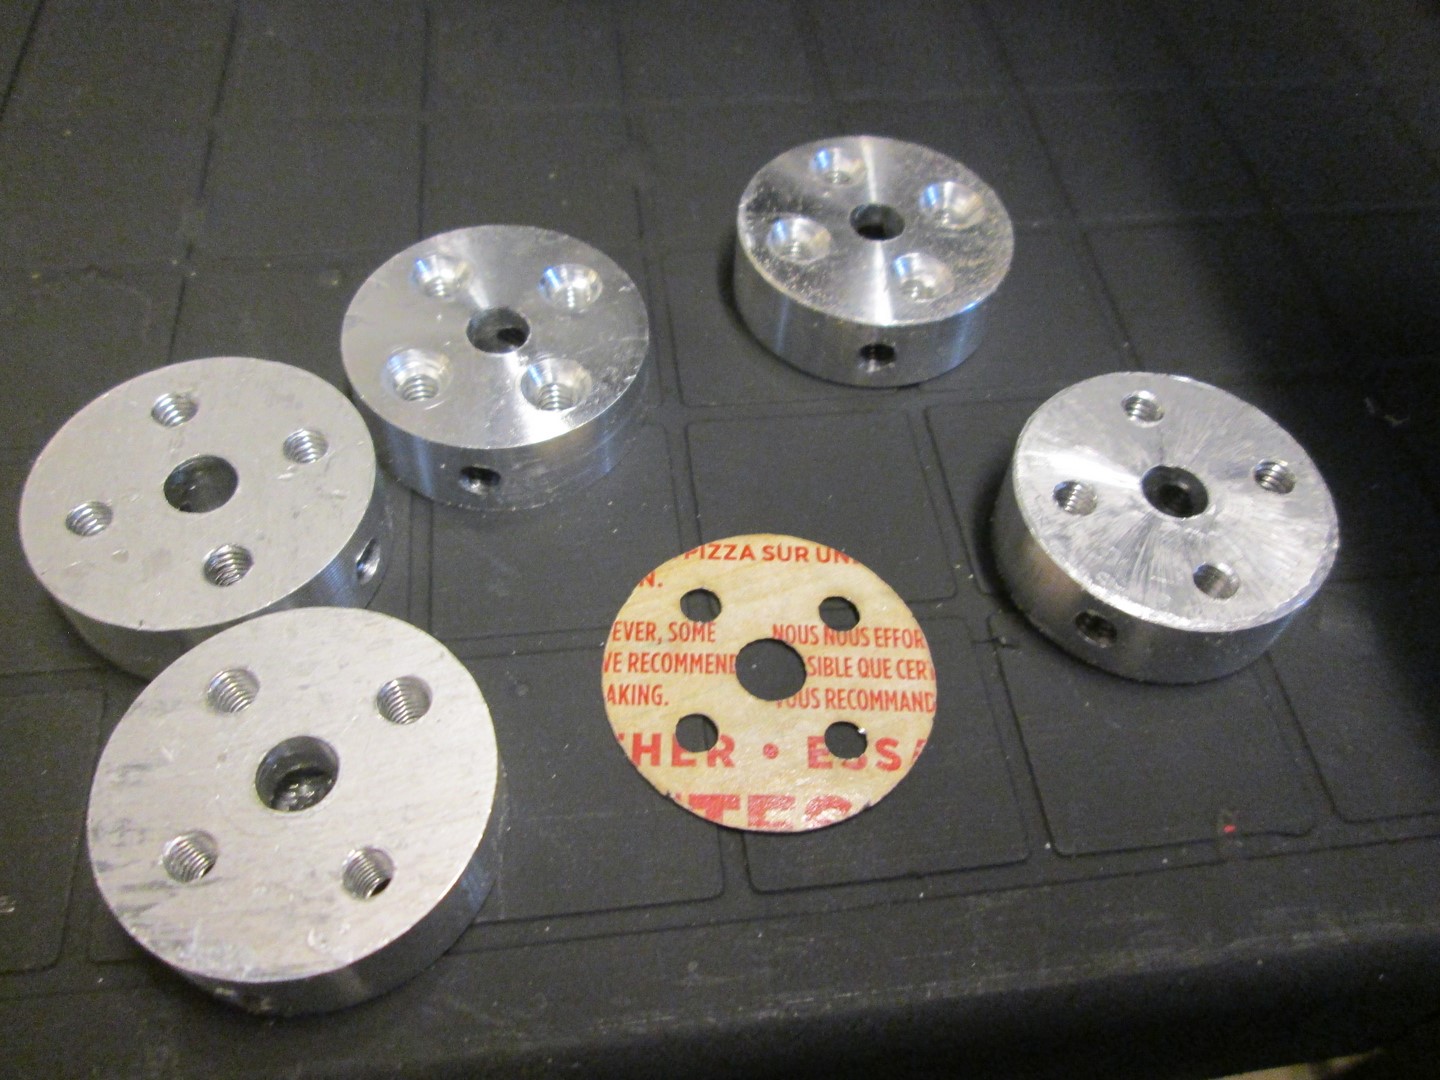
And FINALLY, what I should have done on day 1, making the coupler out of aluminum. I made the template on my laser cutter using a STL-SVG converter program.
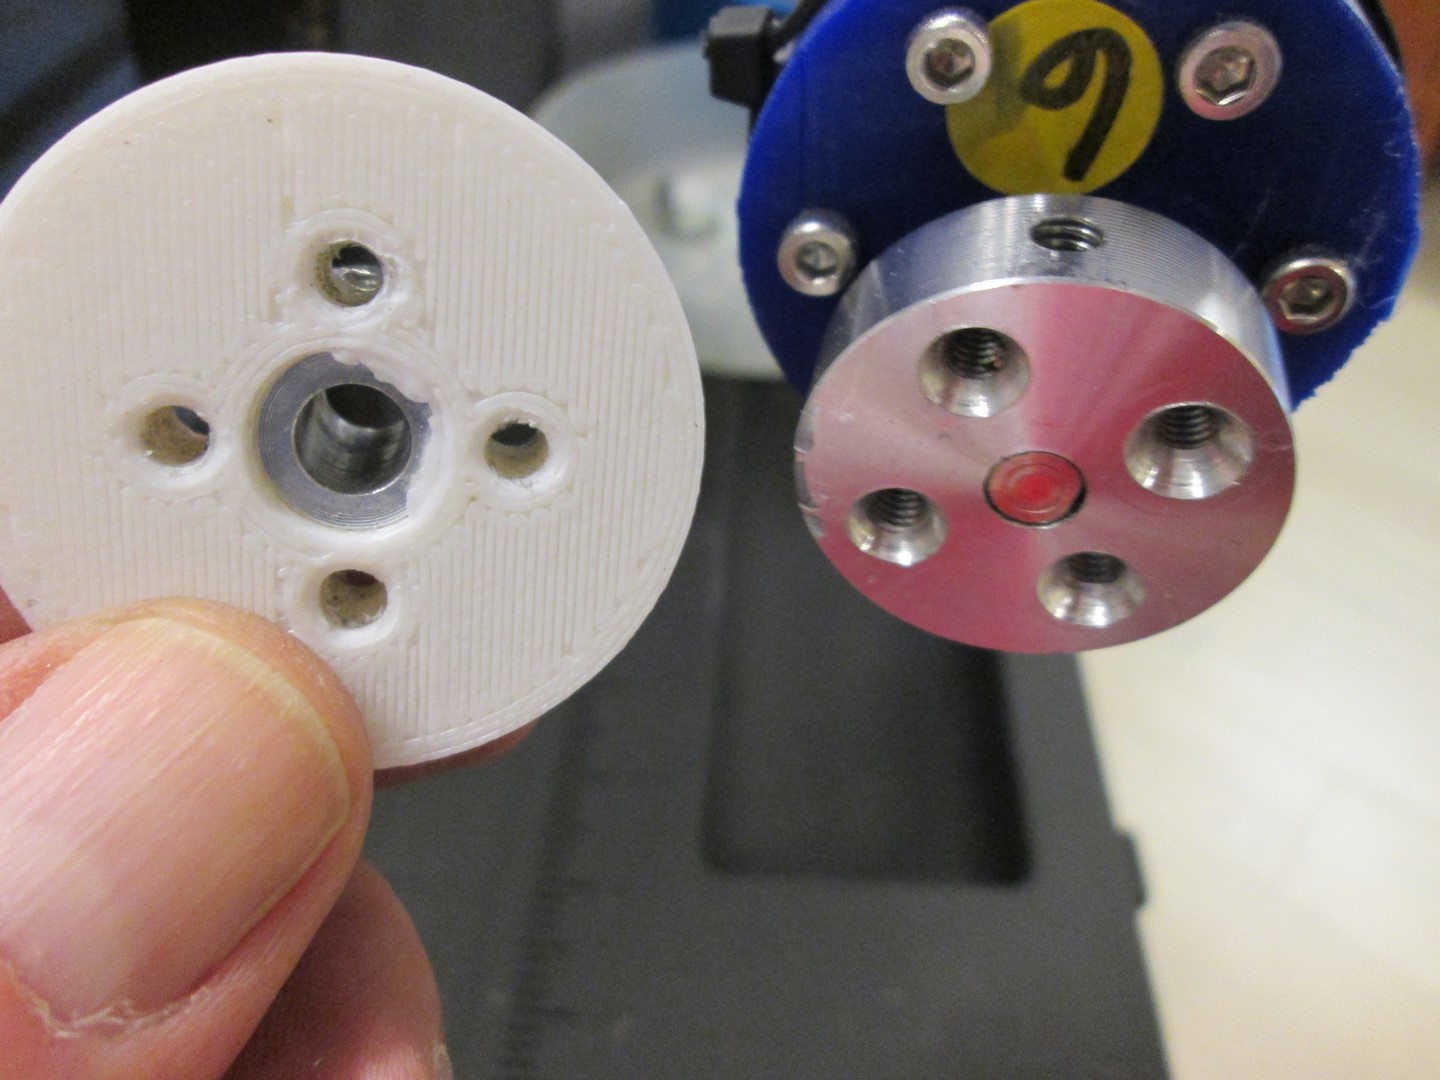
Plastic and metal versions. The problem with the plastic version was that the plastic SHRUNK, so connection to the hub was no longer tight.
Test fitting the metal coupler with test model for rim. Yes, I used Robertson #8-32 screws...it was all I had. This is a Canadian Rover...
Copyright 2024 Queenidog - All Rights Reserved